
In this article, you’ll learn how to build your own newsletter [DIY].
1. Determine the topic, theme, and goal of the newsletter
Before you begin to build or write your newsletter, determine your overall goal and how it fits into your communication/content strategy. Is your newsletter supposed to help educate participants after a webinar or seminar? Drive traffic to your website to download a resource? Figure out what your goal is and the rest will come easily.
2. Select your content
All newsletters built within AdvisorStream must contain at least one article.
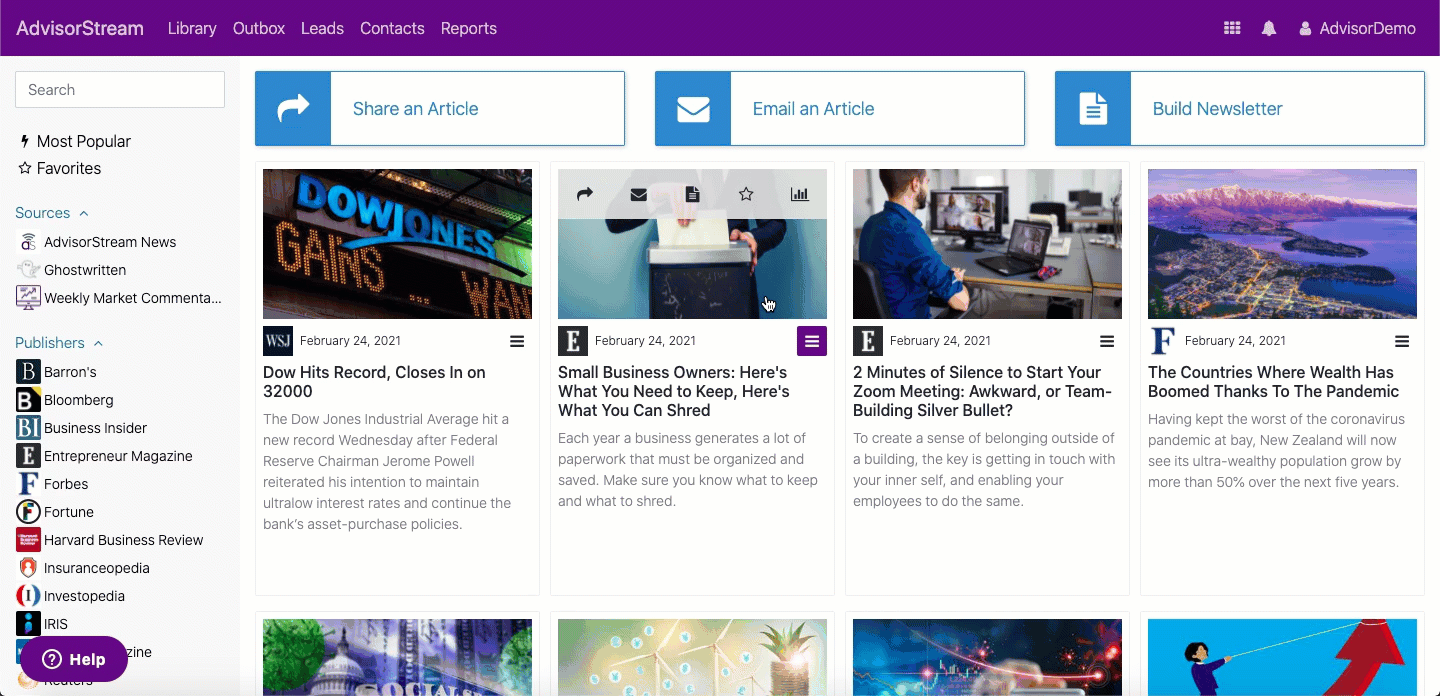
- Begin from the Library and click Build Newsletter.
- Choose your content by clicking on the image of the content piece, the green board indicates the content piece has been selected. You can also use the core searching tools on the left to locate specific content.
- Once you are done selecting your content, click the green Launch Builder button.
Articles
From the Articles section you can:
- Remove articles by clicking on the X
- Rearrange articles by clicking on the image to drag and drop
- Add Articles by clicking on the green Add Articles button.
You’ll then be directed to the Library where you can choose to add new content by clicking on the image, the green border indicates it’s selected. You can also use the core searching tools on the left to locate specific content. - Once you are done choosing content, click the green Launch Builder button.

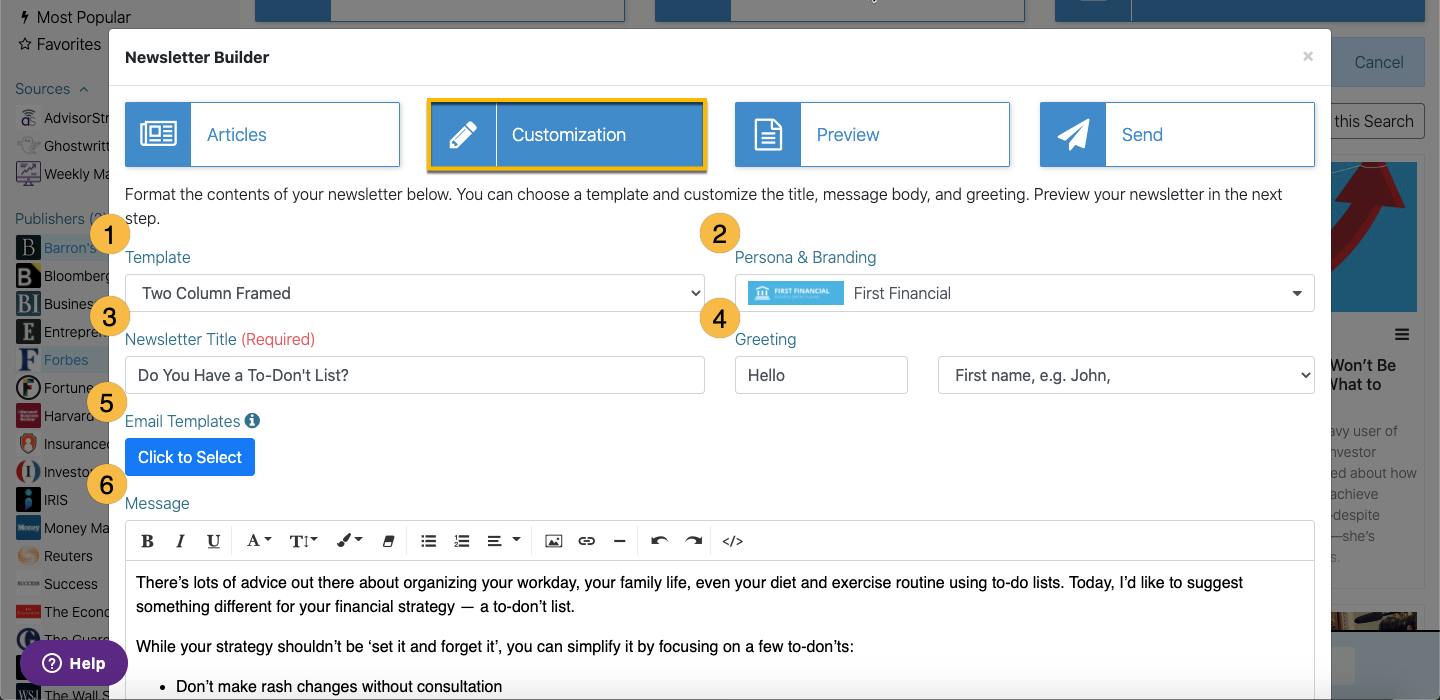
3. Customizations - Create newsletter title & write the body
From the Customization section you can:
- Template – This is where you can change the overall look of the newsletter. The default AdvisorStream template is the Two Column Framed.
- Persona & Branding – You are able to change the persona displayed in the newsletter. Learn more about Personas here.
- Newsletter Title – Determine a title for your newsletter, this is a required field.
- Greeting – This is where you can set up the newsletter to personally address your contacts (if they have their first and last name in their contact details). The drop-down will allow you to choose how you would like to address them by and the text box will allow you to type your greeting word (Hi, Dear, Hello, etc.).
- Email Templates – By clicking Click to Select you will have the ability to choose a newsletter template from a list of pre-built body messages.
- Message – This area is where you write the body of the newsletter. Remember to save your work as you go (see below).
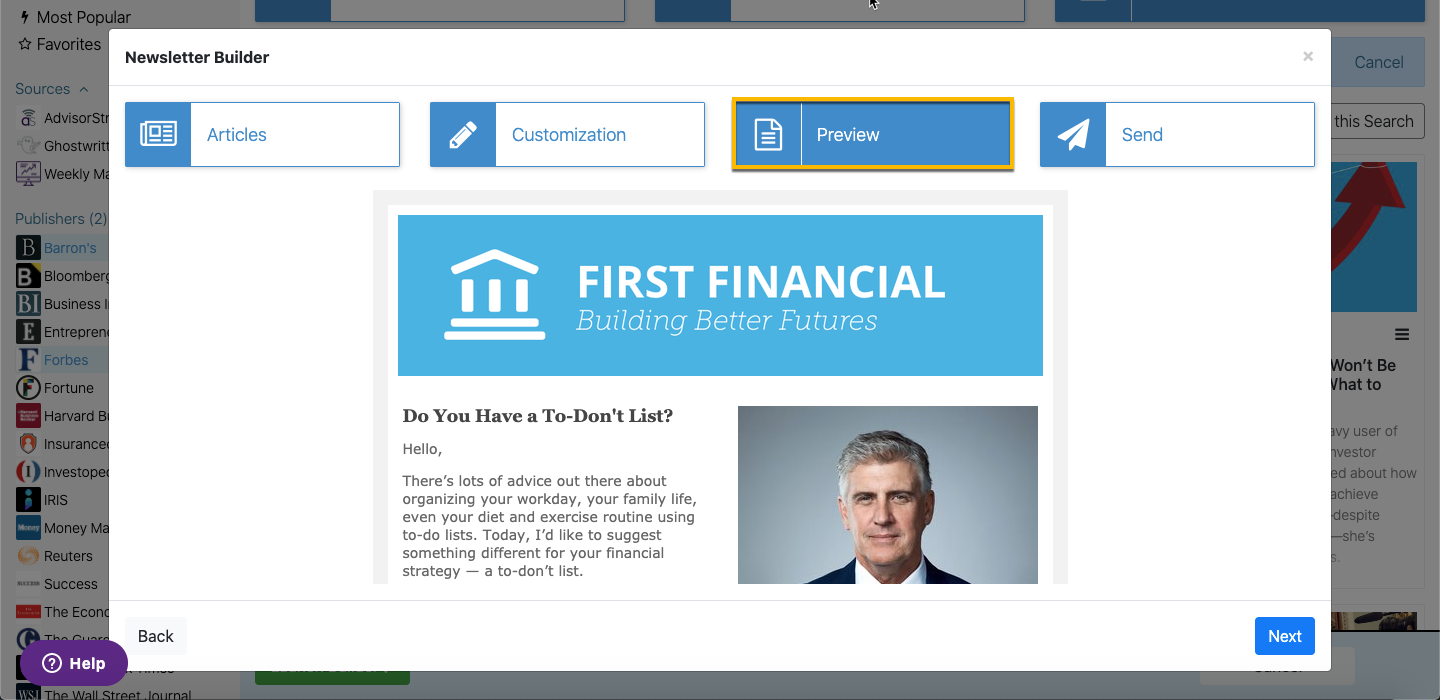
Preview
From the Preview section, you can review your newsletter before submitting to compliance approval or sending it. The Preview also automatically saves your work.
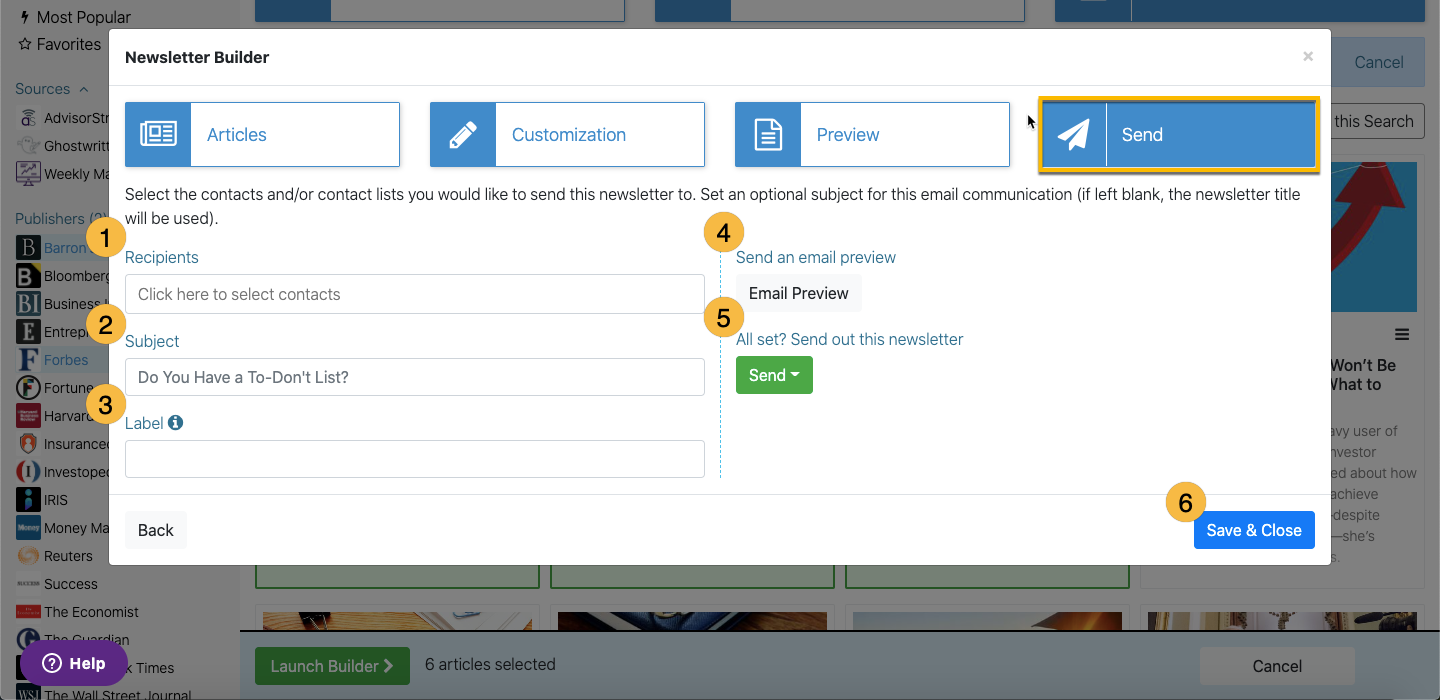
Send
The Send section is the last step where you can finalize the newsletter and make sure it is ready to be sent out or save your work and return at a later date.
- Recipients – Choose who the newsletter is sent to. When creating your own newsletter you must choose from your list of Contact(s).
- Subject – This is the subject line displayed in the mailbox of your contact(s).
- Label – The label is used for your own organizational purposes. It is not client-facing but will appear beside the title of the newsletter in the Outbox.
- Email Preview – Send yourself a test version of the newsletter by email.
- Send – Choose to Send now or Schedule for later (specific date/time).
a) Submit for Review: For those on an integrated compliance workflow, you must click the Submit For Review button and obtain compliance approval before sending. You will receive an email notification once compliance has approved your newsletter. Return to the newsletter builder and click Send or schedule it for a later date. - Save & Close - Remember to save your work! If you aren't ready to send or submit for review, you can always save your work and return to it later.
Comments
0 comments